
Katrina’s Guide: How to Declutter and Organise your Clothes
Now is the time to stay at home. For you, this may be a unique opportunity to finally declutter and organise your wardrobe, and face something you’ve been putting off for months (or years!). And for all of you KonMari fans out there, you already know that in the KonMari Method, clothes is the first category out of five and where our tidying journey begins.
Why? Because clothes are a reflection of our choices, personality and preferences. You can learn a great deal about yourself and what’s stopping you from letting go of things when you tidy your clothes. And once you’ve completed this category, the sense of accomplishment and order you experience every day when you get dressed and put things away, can be an incredible motivator to continue with the other categories in your home (books, papers, komono and sentimental items).
So are you ready for the task?! Here are the ten steps you should follow to successfully ‘KonMari’ your clothes!…

Client RP’s wardrobe ~ Before

Client RP’s wardrobe ~ After
Step One: Visualise
Before you begin, take a moment to imagine how you want your finished wardrobe to look. How do you want to feel when you enter that space?

Client RP’s clothing pile
Step Two: Locate ALL your clothing
To effectively tidy your clothes, you have to find them all first. This includes clothes in the loft you haven’t seen for a decade, coats by the front door and items lurking in someone else’s room.
Step Three: ‘The power of the pile’
Bring all of your clothing to one spot (usually the bed, as that will inspire you to keep going because you want to sleep there tonight!). Seeing your ‘clothing mountain’ allows you to fully grasp the overall volume of clothing you own.
Step four: Choose what you want to keep
In KonMari, we focus on choosing what you would like to keep instead of how much you intend to discard. To achieve this, take each item in your hands, one at a time, and ask yourself the following questions:
- Does this spark joy? In other words, does this make me happy?
- Do I actually use this? Have I ever used it?
Step five: Express gratitude
Say ‘thank you’ for the items you’re discarding. Every item has taught us something and served a purpose in some way. For example, ‘thank you yellow trousers for teaching me that yellow isn’t my colour after all!’
Step six: Subcategorise
For the clothes you’re keeping, start piling them into tops, trousers, dresses, shirts, underwear, socks etc. This allows you to see the volume of each category. Do you need to keep 60 pairs of socks? If you feel you’re keeping too many, choose a target number and commit to owning that amount.
Step seven: Finish discarding first
Don’t put anything away until you’ve completed your ‘joy checks’ on all of your clothing. Shoes and accessories normally follow clothing but if you’re inspired, tackle these categories too.
Step eight: Fold!
In the KonMari Method, we fold as many items as possible. Folding and storing your items vertically saves on space and allows you to see at a glance everything you own.

Client RP ~ Lounge wear drawer before
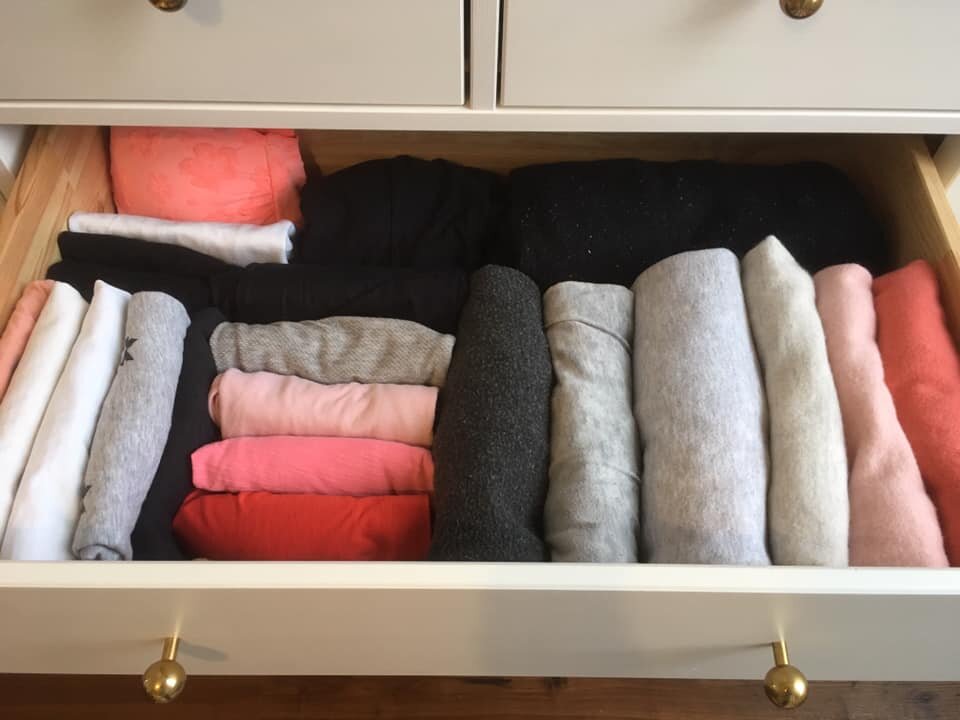
Client RP ~ Lounge wear drawer after she learnt how to fold her items and store them upright
Step nine: store clothing by category
Whether storing items in a drawer, basket or by hanging, store like with like. Colour coding is optional but always my preference!
Step ten: step back and admire
Congratulations, you have officially completed category one of the KonMari Method. Keen to tidy your entire home? Get ready to move on to category two: Books. Good luck!
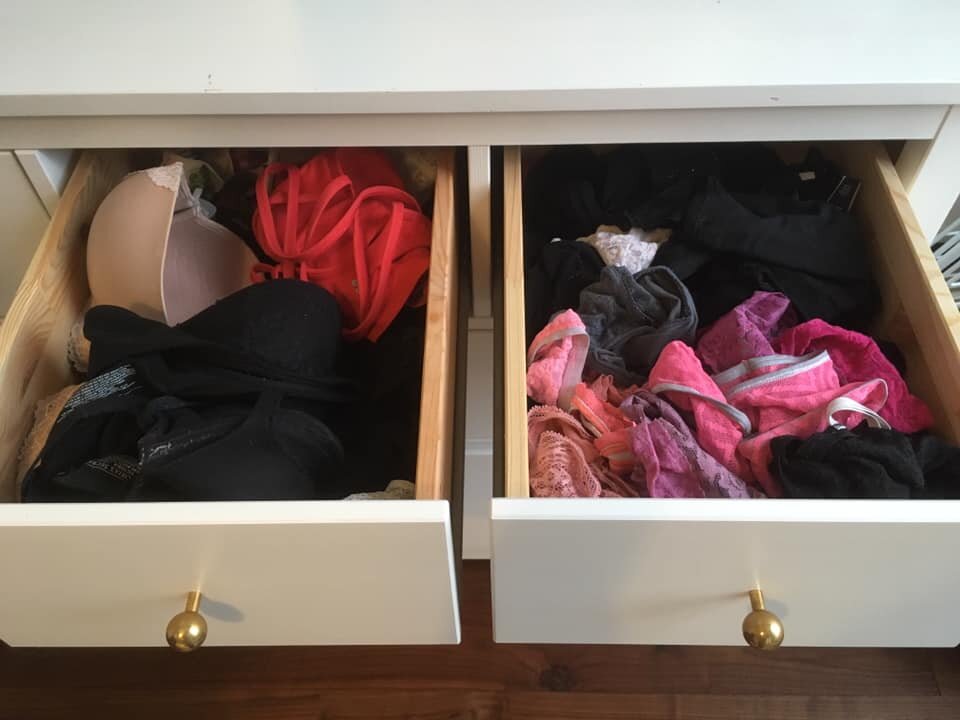
Client RP’s underwear drawer before
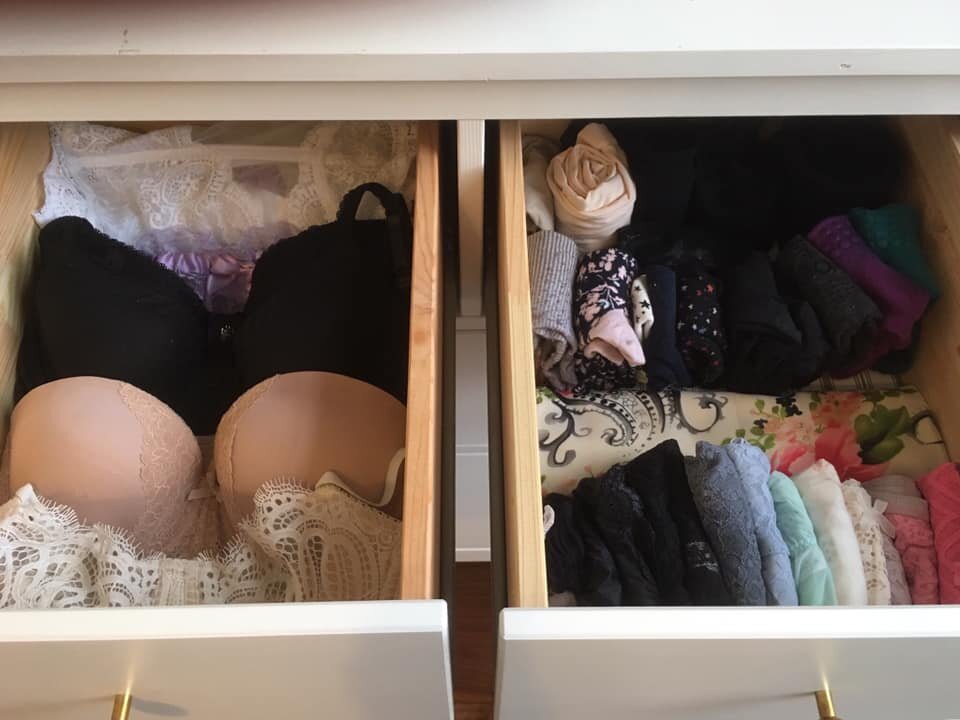
Client RP’s underwear drawer after